Recently I made a batch of my own Homemade Date Bars, followed by a second batch only a few days later. I really enjoy LARABARs. They are a great way to refuel after a workout. But I also enjoy making homemade foods, so this recipe is the best of both worlds.
This post will explain exactly how to make the homemade date bars. They are affordable, easy to make and healthy. You also have control over the ingredients and can make sure they have no preservatives in them by making them yourself.
Homemade Date Bars
All About Homemade Larabar
Some of you asked for a recipe for my homemade date bars. I started by looking at the LARABAR website, where the ingredients for all of their bars are listed. The ingredients are also listed on the package of each bar, in order of most used to least used ingredient.
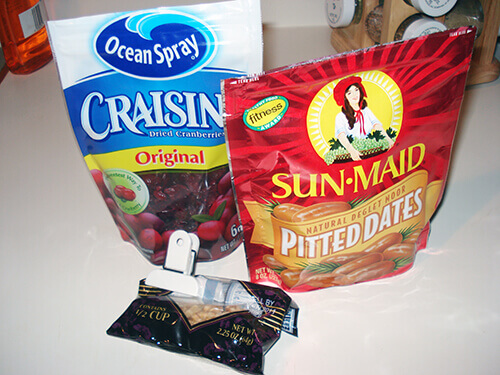
Keep in mind pitted dates will form the bulk of your recipe, despite which flavor you make. This recipe is for a cranberry-flavored homemade date bar. Here are the ingredients you will need to gather before you are ready to make this recipe:
What Size Ingredients to Buy
I bought an 8-ounce bag of pitted dates and that made me what I would say is equivalent to eight mini LARABARS or about six of the regular bars.
I found a jumbo case of dates at the grocery story after purchasing the small bag. Next time I’ll buy in bulk.
Step by Step Directions
I filled my Cuisinart Mini-Prep Processor (4 cup capacity) with 3 cups of dates. I chopped the dates for a few seconds. Then I added 1/8 cup of dried cranberries and 1/8 cup of walnuts. Then I chopped the ingredients again until they were well blended.
Related blog posts:
• Cheesy Macaroni Cauliflower Bake Recipe
• The Time I Accidentally Made Swiss Chard Pie
• Body Reset: Jumpstart Your Health Now
• Cheap Grocery List 18 Essential Foods
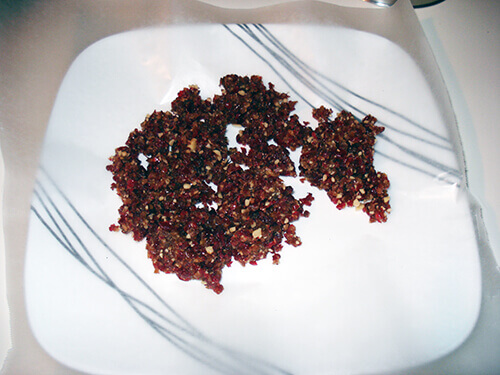
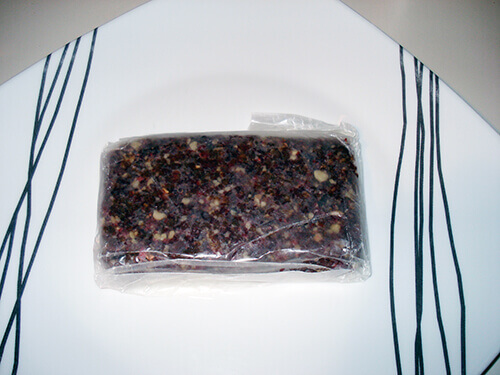
Once the ingredients are chopped, place a sheet of wax paper on top of a plate and then pour the mixture on the paper. Push down pretty hard and form the mass of ingredients into one large thick bar.
Let the bars chill in the refrigerator for 30 minutes. Take them out, unwrap the large bar, cut it into smaller bars and re-wrap each bar in its own wax paper. Store the food in an air-tight container.
Date Nut Bars
The following are photos of how I prepared and wrapped the date bars. The first photo shows them on the wax paper and the second photo shows how I molded the date bar into a rectangle.
The great part about making these homemade is you can make any size or shape you desire. Also if you want you can make them smaller as mini date bars. The small size is great for a light snack or for children.
Homemade Date Energy Bars


How to Store Date Bars
I stored the homemade date bars in the refrigerator. The big difference with making these at home is that you won’t have the airtight, light-resistant packaging that a purchased bar would have.
I opted to store mine in the refrigerator just to make sure they didn’t get too warm sitting out and possibly go bad. They were so good I ended up eating the first batch of homemade date bars in just two days.
Homemade Larabar
In Summary
I hope this post was helpful in learning how to make your own date bars. These are easy, quick and affordable. In addition by making them yourself you can be assured there are no preservatives and you know exactly what ingredients are in the bars.
Do you have any questions on this recipe?


These look so good and really easy to make! I love making my own protein bars at home. We don’t have a food processor, but could still make it work with a little (or a lot) of stir action. =)
My in-laws gifted me a handheld chopper Christmas. Something like that might work too. I know the Pampered Chef line makes one as well.
Now that I bought my food processor maybe I'll try to make these!
I think I'll have to try that recipe. Thanks!
yum!